Indirect Solar Dryer
A sustainable engineering solution designed to optimize agricultural drying processes using renewable energy. This project involved rigorous thermodynamic modeling, CAD design, and hands-on fabrication to reduce crop waste.
Role
Mechanical Engineer
Duration
1 Year (Academic)
Core Focus
- Thermodynamics
- Material Sourcing
- Structural Integrity
Information Architecture
The functional workflow from solar collection to final crop dehydration.
Design Process
Research
Design
Fabrication
Testing
Competitive Analysis
Traditional open-sun drying exposes crops to UV rays and contamination. Our indirect system protects nutrient content while doubling drying efficiency.
The Differentiator
"Isolated drying chamber preventing direct UV degradation of nutrients."
+40%
Drying Speed
Max
Nutrient Retention
-30%
Waste Reduction
Zero
Energy Cost
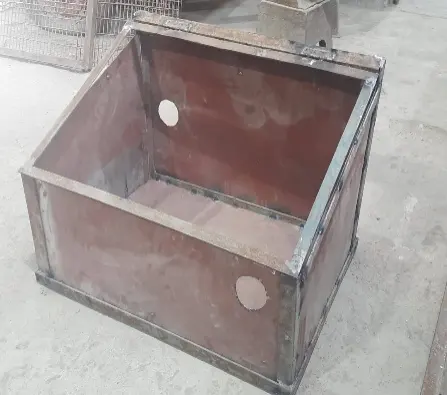
Design & Modeling
CAD Refinement & Simulation
Detailed 3D modeling used to simulate airflow and heat distribution within the collector and drying chamber.
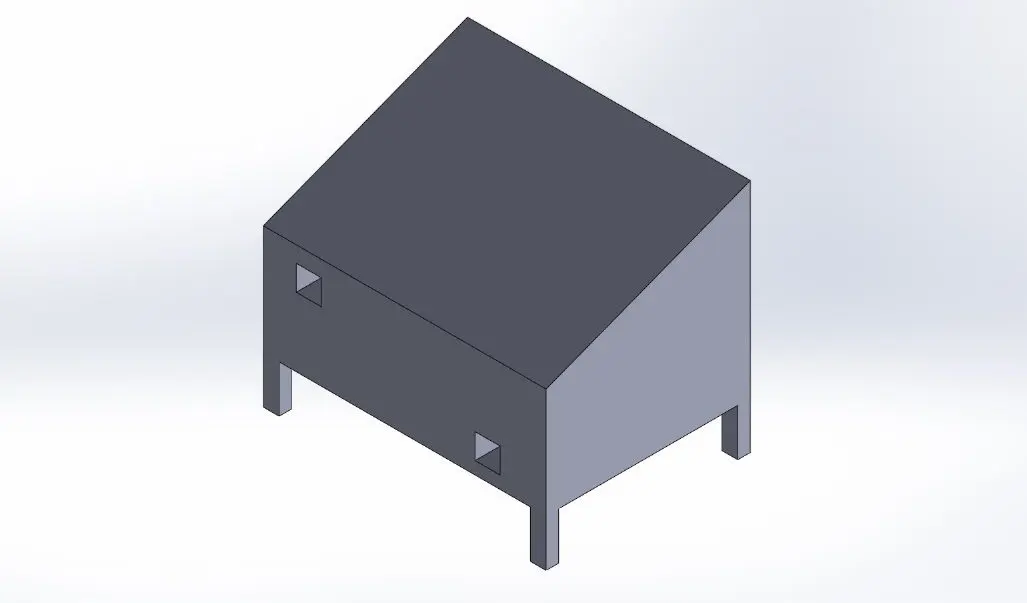
Structural Architecture
Structural analysis of the drying chamber to ensure insulation and minimal heat loss through the body walls.
Engineering Specs
Engineering material palette and technical specifications.
Steel (Body)
#71717A
Copper (Pipe)
#B45309
Glass (Cover)
#A5F3FC
Coating (Black)
#09090B
Typography
Inter / Roboto
Selected for technical clarity and international engineering standards.
Iconography
Technical Details
Material Spec
Thermal Indicator
"The system achieved a 40% reduction in drying time with significantly higher nutrient retention, proving the viability of renewable energy in local agriculture."
Project Outcome